Easy Boston Cream Pie Recipe: Layers of Cake, Custard & Chocolate Glaze
Welcome to the world of quintessential American desserts! The Boston Cream Pie, despite its misleading name, is a truly iconic
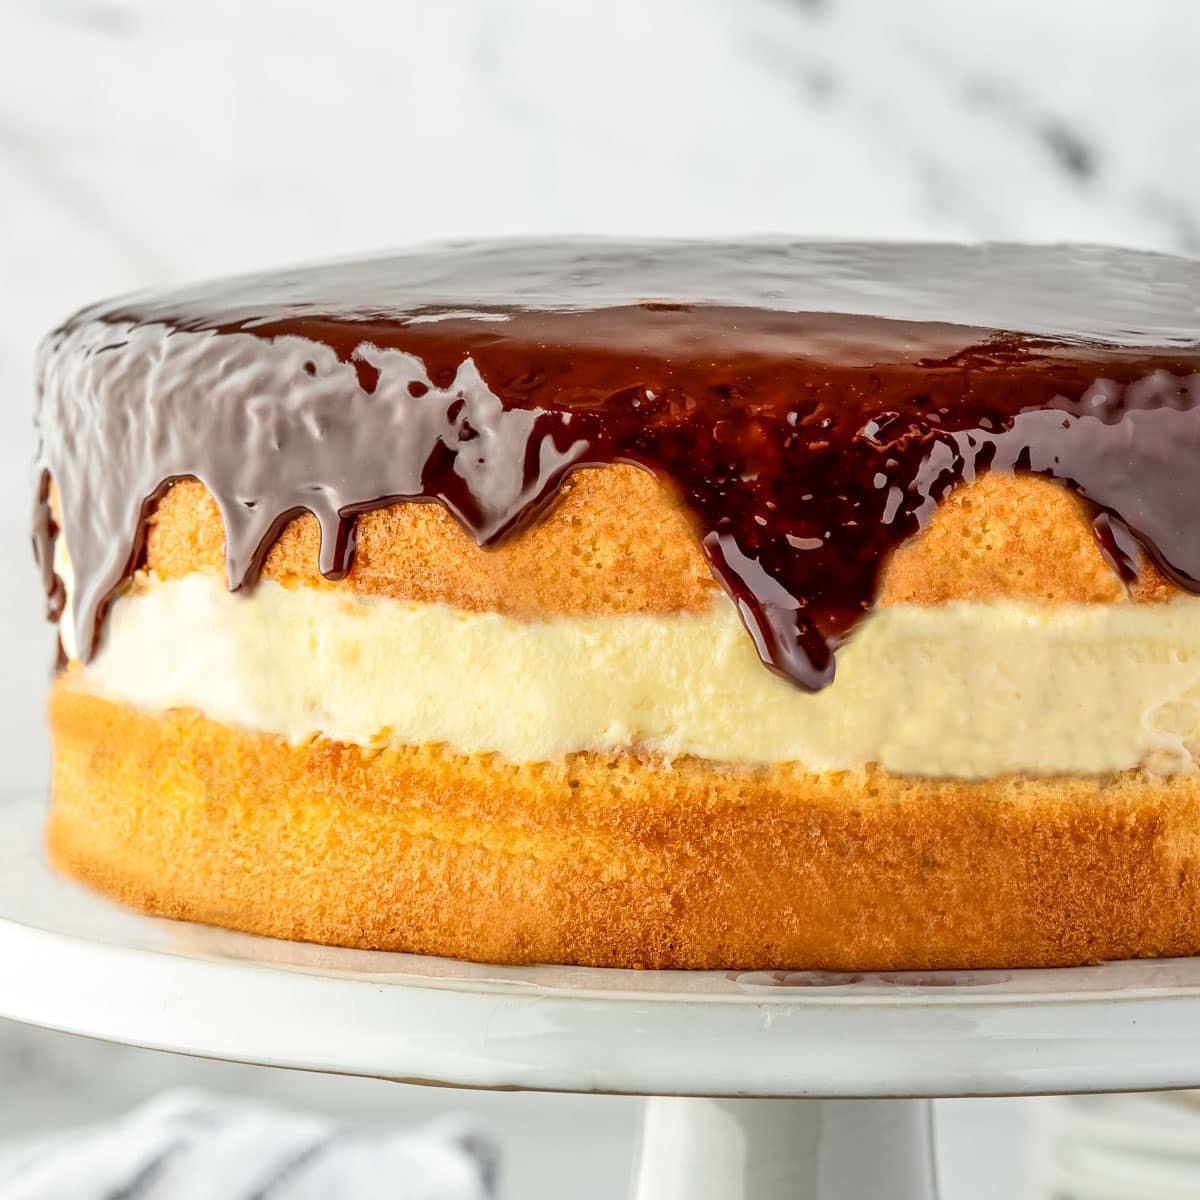
, a masterpiece of textures and flavors. Imagine a dessert featuring delicate, golden sponge cake layers, generously filled with a velvety vanilla custard, all crowned with a glistening, rich chocolate glaze that drips enticingly down the sides. It's a show-stopper that promises elegance without the intimidation. This comprehensive guide will walk you through crafting your very own easy Boston Cream Pie, transforming your kitchen into a sweet haven. Prepare to bake a classic that's surprisingly simple to master and utterly impossible to resist!
What Makes a Boston Cream Pie Cake So Irresistible?
At its heart, the appeal of a lies in its harmonious combination of components, each playing a crucial role in creating a dessert that delights the senses. It’s a symphony of contrasts – light and airy against rich and creamy, sweet against a hint of bitterness.
* A Symphony of Textures: The foundation is a light, tender sponge cake that provides a delicate structure, perfectly complementing the luscious, almost liquid, quality of the vanilla pastry cream. This cream is smooth, opulent, and melts in your mouth. Topping it all is a glossy, slightly firm chocolate glaze that adds a final layer of decadence and a satisfying textural counterpoint. The interplay between the soft cake, velvety custard, and smooth glaze is what truly sets this dessert apart.
* Show-Stopping Presentation: There's an undeniable artistry in the presentation of a Boston Cream Pie. The dramatic cascade of the dark chocolate glaze over the pale yellow cake and custard layers creates an aesthetically pleasing, Instagram-worthy dessert. It looks sophisticated and complex, making it a perfect centerpiece for any celebration or special occasion.
* A Hug of Nostalgia: For many, this classic New England dessert evokes a comforting sense of nostalgia. It’s a taste of tradition, a dessert that has graced family tables for generations. Baking it brings a piece of culinary history into your home, perfect for holidays, gatherings, or simply a cozy evening treat.
* Flavorful Depth (Optional Indulgence): While delicious on its own, many traditional recipes incorporate a subtle hint of rum or another spirit into the pastry cream or even the cake batter. This adds a sophisticated depth of flavor, elevating the dessert beyond simple sweetness without overpowering its delicate profile. We’ll cover how to include this optional touch for an extra layer of gourmet appeal.
Demystifying the "Pie": A Sweet History Lesson
One of the most charming quirks of this beloved dessert is its name. A is, unequivocally, a cake, not a pie. So, how did it earn its confusing moniker? The story takes us back to the mid-19th century in Boston, Massachusetts.
The legend begins at the venerable Parker House Hotel (now the Omni Parker House), one of America's oldest continuously operating hotels. It was here, around 1856, that the hotel's chef, M. Sanzian, is credited with creating what was then called "Parker House Chocolate Cream Pie." During that era, cakes and pies were frequently baked in similar round pans, and the terms were often used interchangeably. Hence, a layer cake with a cream filling and a chocolate topping might have been referred to as a "pie." The name "Boston Cream Pie" simply stuck, even as culinary distinctions became clearer over time.
This historical tidbit adds to the charm of the dessert and is often a fun fact to share when serving this classic. It also highlights the dessert's enduring legacy as a true American original. To delve deeper into this intriguing culinary mystery, you might enjoy reading Boston Cream Pie: Why This Classic 'Pie' Is 100% Cake.
Essential Ingredients for Your Homemade Boston Cream Pie Cake
Creating a truly exquisite begins with selecting quality ingredients. Each component plays a vital role in achieving that perfect balance of flavor and texture.
For the Light & Tender Sponge Cake:
- All-Purpose Flour: The structural backbone of our cake. Sift it for an even lighter texture.
- Baking Powder: Our leavening agent, ensuring the cake rises beautifully and remains airy.
- Salt: A crucial flavor enhancer, balancing the sweetness and bringing out the depth of other ingredients. Don't skip it!
- Unsalted Butter: Adds richness and moisture to the cake. Melting it gently with milk infuses flavor evenly.
- Whole Milk: Contributes to the cake's tender crumb and moistness.
- Pure Vanilla Extract: Essential for that warm, comforting flavor. Always opt for pure vanilla for the best results.
- Large Eggs & Granulated Sugar: Whisked together until light and fluffy, they provide lift and sweetness, forming the airy base for our sponge.
For the Velvety Vanilla Custard (Pastry Cream):
- Whole Milk: The base of our rich pastry cream. The higher fat content of whole milk contributes significantly to its creamy texture and flavor.
- Large Eggs + Extra Egg Yolks: Eggs provide thickening and richness. The extra yolks are key to achieving that luxurious, velvety consistency and a beautiful golden hue.
- Granulated Sugar: Sweetens the custard to perfection.
- Cornstarch: This is our secret weapon for a smooth, thick, and perfectly set custard that slices cleanly when chilled. It prevents a grainy texture.
- Salt: A tiny pinch brightens all the flavors in the custard.
- Unsalted Butter: Stirred in at the end, it adds an incredible richness and silkiness to the finished pastry cream.
- Pure Vanilla Extract: Infuses the custard with its signature warm, sweet aroma.
- Rum (Optional): A splash of dark rum or brandy adds a sophisticated, complex depth to the pastry cream. Feel free to omit for an alcohol-free version.
For the Decadent Chocolate Glaze:
- Heavy Cream: Provides the richness and forms the base for our ganache-like glaze.
- Light Corn Syrup: This is the secret to a beautifully shiny, smooth glaze that maintains its luster and prevents cracking.
- Bittersweet or Semi-Sweet Chocolate: High-quality chocolate is paramount here. Bittersweet chocolate provides a delightful contrast to the sweetness of the cake and custard, creating a well-balanced flavor profile. Chop it finely for quick melting.
- Pinch of Salt (Optional): Just a tiny amount can enhance the chocolate flavor.
Step-by-Step Guide to Crafting Your Easy Boston Cream Pie Cake
Don't let the elegant appearance fool you; assembling a is a joyous process, broken down into three manageable stages. We'll start with the filling, move to the cake, and finish with the glorious glaze.
Step 1: The Velvety Vanilla Custard (Pastry Cream) – The Heart of the Pie
- Heat the Milk: In a medium saucepan, gently heat the whole milk over medium heat until it just begins to simmer around the edges. Do not let it boil vigorously.
- Whisk Egg Mixture: In a separate heatproof bowl, whisk together the egg yolks, granulated sugar, cornstarch, and salt until light yellow and smooth. The cornstarch helps prevent scrambling.
- Temper the Eggs: Slowly, in a thin stream, whisk about half of the hot milk into the egg yolk mixture. This crucial step "tempers" the eggs, gradually raising their temperature to prevent them from curdling when added to the hot milk.
- Cook the Custard: Pour the tempered egg mixture back into the saucepan with the remaining hot milk. Cook over medium heat, whisking constantly, until the mixture thickens significantly and comes to a gentle boil for 1-2 minutes. It should coat the back of a spoon.
- Finish & Chill: Remove from heat and immediately stir in the unsalted butter, pure vanilla extract, and optional rum until smooth and combined. For an ultra-smooth custard, press it through a fine-mesh sieve into a clean bowl. Cover the surface directly with plastic wrap to prevent a skin from forming and chill in the refrigerator for at least 2 hours, or until firmly set. This can be made a day in advance!
Step 2: The Light & Airy Sponge Cake Layers – The Foundation
- Prepare Pans & Preheat Oven: Preheat your oven to 325°F (160°C). Grease and flour two 9-inch round cake pans, tapping out any excess flour. You can also line the bottoms with parchment paper for easy removal.
- Combine Dry Ingredients: In a medium bowl, whisk together the all-purpose flour, baking powder, and salt. Set aside.
- Prepare Wet Ingredients: In a small saucepan or microwave-safe bowl, gently heat the milk and butter until the butter is just melted. Stir in the pure vanilla extract. Let cool slightly.
- Whip Eggs & Sugar: In a large mixing bowl (preferably using a stand mixer with a whisk attachment), beat the large eggs and granulated sugar on high speed for 5-7 minutes until the mixture is very light in color, thick, and has tripled in volume. This creates the airy structure of the sponge.
- Combine Mixtures: Reduce mixer speed to low. Gradually add the flour mixture in three additions, alternating with the milk mixture, beginning and ending with the flour. Mix just until combined, being careful not to overmix, as this can lead to a tough cake. Scrape down the sides of the bowl as needed.
- Bake: Divide the batter evenly between the two prepared cake pans. Bake for 25-30 minutes, or until a wooden skewer inserted into the center comes out clean and the cakes spring back lightly when touched.
- Cool: Let the cakes cool in the pans for 10 minutes before inverting them onto wire racks to cool completely.
Step 3: The Decadent Chocolate Glaze – The Crowning Glory
- Prepare Chocolate: Finely chop your bittersweet chocolate and place it in a heatproof bowl.
- Heat Cream Mixture: In a small saucepan, combine the heavy cream and light corn syrup. Heat over medium heat until it just comes to a simmer.
- Make Glaze: Pour the hot cream mixture over the chopped chocolate. Let it sit for 5 minutes without stirring to allow the chocolate to melt. Then, whisk gently from the center outwards until the glaze is completely smooth and glossy. If desired, stir in a pinch of salt.
- Cool Slightly: Allow the glaze to cool for 10-15 minutes, stirring occasionally, until it thickens slightly to a drizzly but not runny consistency. This will ensure it creates those beautiful drips.
Step 4: Assembly – The Grand Finale
- Level Cakes (Optional): If your cake layers have domed tops, use a serrated knife to carefully level them, creating a flat surface for assembly.
- Fill the Cake: Place one cooled cake layer on your serving plate or cake stand. Spread the thoroughly chilled and firm vanilla pastry cream evenly over the top, leaving a small border.
- Top Layer: Gently place the second cake layer on top of the custard.
- Glaze the Cake: Pour the slightly cooled chocolate glaze over the center of the top cake layer. Using an offset spatula or the back of a spoon, gently spread the glaze towards the edges, allowing it to drip naturally down the sides. For the best "drip" effect, you may need to gently encourage it around the edges.
- Chill: For the best flavor and setting, chill the assembled for at least 30 minutes before slicing and serving. This allows the flavors to meld and the glaze to set.
For even more detailed guidance and tips on perfecting your presentation, consider reading Bake the Iconic Boston Cream Pie: A Nostalgic, Show-Stopping Dessert.
Tips for Boston Cream Pie Perfection
- Plan Ahead: The pastry cream benefits greatly from being made a day in advance. It allows it to fully chill and thicken, making it easier to spread.
- Don't Overmix the Cake Batter: Overmixing develops gluten, which can lead to a dense, tough cake. Mix just until ingredients are combined.
- Quality Chocolate for Glaze: Using good quality bittersweet chocolate for your glaze makes a noticeable difference in flavor and shine.
- Room Temperature Ingredients for Cake: Ensure eggs and milk are at room temperature for the cake batter. This helps them emulsify better, leading to a smoother batter and a finer crumb.
- Serve Chilled: While delicious at room temperature, Boston Cream Pie is best enjoyed chilled, as it allows the custard to retain its firmness and the flavors to fully develop.
This easy Boston Cream Pie recipe is more than just a dessert; it's an experience. From its intriguing history to its captivating layers of flavor and texture, it’s a timeless classic that brings joy to any table. So, roll up your sleeves, gather your ingredients, and embark on the delightful journey of baking this iconic . You’ll be rewarded with a truly world-class dessert that tastes as wonderful as it looks. Enjoy every luxurious bite!